Introduction and purpose
"Metis Marker brings you the opportunity to create NATO joint military symbols according to APP-6(C).
It allows to build symbols from components, including frame, icon, first modifier, second modifier and amplifiers, rather than pre-define all possible symbols."
- from the steam workshop page
It brings more immersion and depth to markers.
Credit: johnb43 (content, layout), Garfield0003 (advice, content)
How to use
To place down a metis map marker, open your map and use the "Open Marker Interface" key. Default keys are listed below:

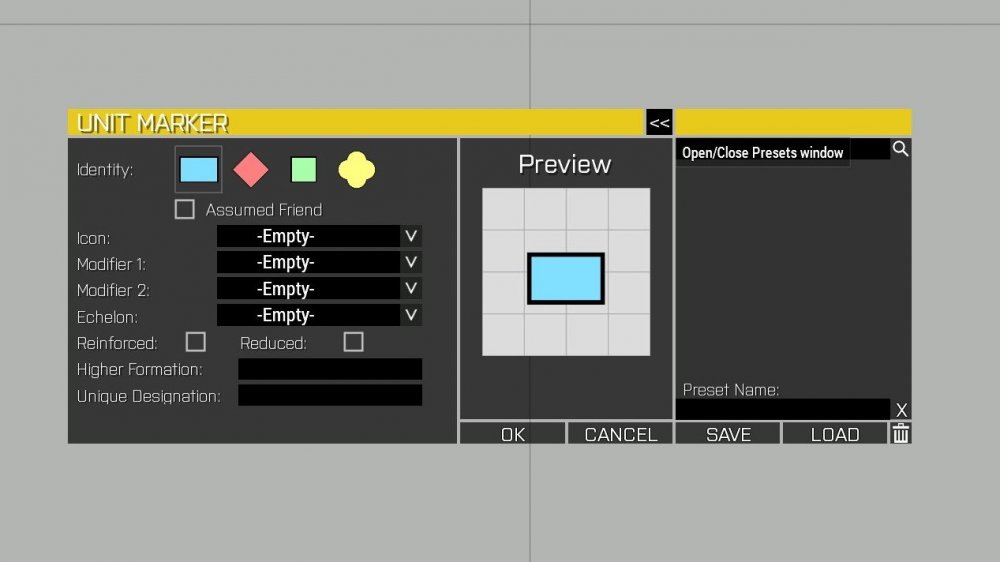
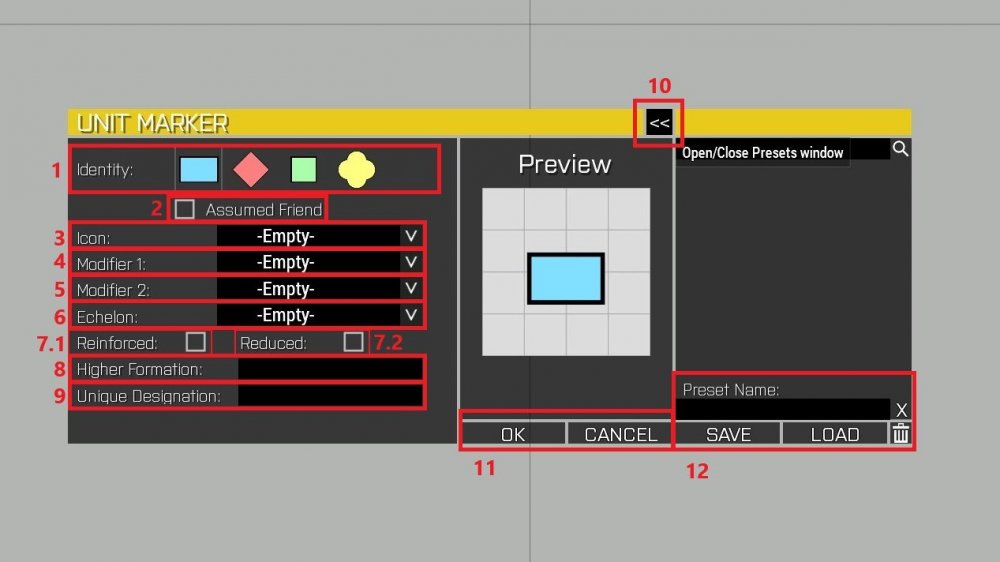
Once you open the interface, you will see this (minus the preset window on the right, which by default is collapsed; however that can be changed via CBA settings).
- Adds the status of the target: Friendly, hostile, neutral or unknown.
- You know something is there, but you are not 100% sure - Old/unreliable Intelligence.
- Adds the type of target: Armor, air, artillery etc.
- Provides a modifier to show additional capability of the unit. This marker must be used in conjunction with a major symbol selected in 3.
- Provides a modifier to show additional capability of the unit. This marker must be used in conjunction with a major symbol selected in 3.
- Adds what size the force is: Army, Platoon, Squad etc.
-
7.1 signifies a slightly larger number of units, 7.2 a reduced number.
It is possible for a unit to have both if there is a combination of units present. - The name of the formation the unit is a part of. e. g. The FK Platoon marker could have a higher formation of 3rd IB.
- The name for the unit. e. g. A1.
- Button to toggle the presets window.
- Buttons to either create marker or cancel the action. Enter can also be used to create a marker.
- You can select a preset from the window and load it. If you want to create one, type a name and press "save" - it will save the current marker for later use.
Details around military markers can be found in thrilling reads such as the NATO APP 6C document. (Yes it is a big long chunky read going into more detail than what we would use.)
Each time you change an aspect of the marker, the preview will reflect that. Once you are done with adding the wanted information, press the Enter key or the "Ok" button to create the marker.
When a marker is created it can be interacted with like a basegame marker: You can move, edit and delete it. But you can also copy and paste it.
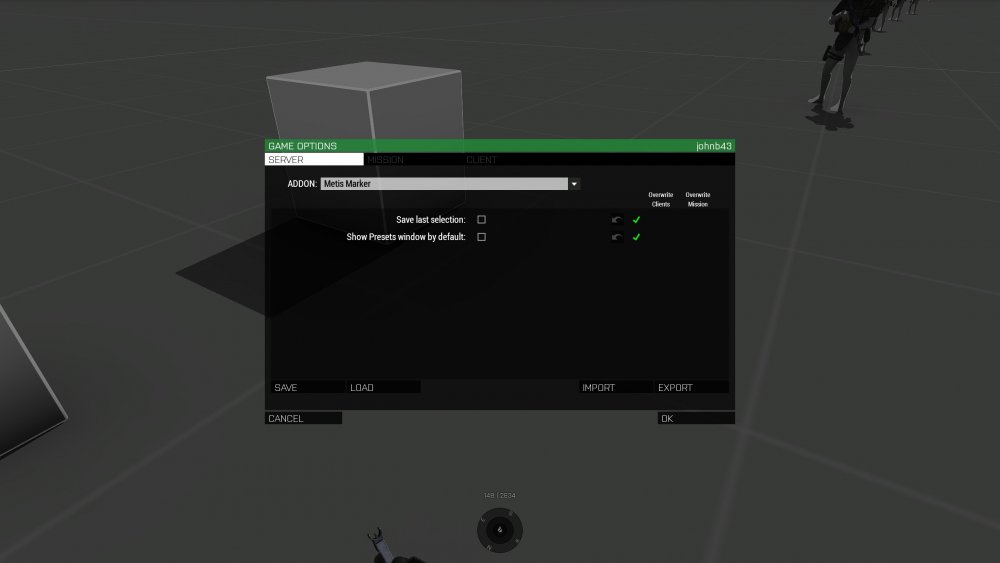
The default CBA settings:
- "Save last selection": It saves what was last selected in the menu and loads it again when reopening the interface. Handy if you use a lot of the same markers.
- "Show Presets window by default": If enabled, the preset window will be shown directly when opening the interface. Handy if you use presets a lot.
Limitations
Of note, the markers will not save within a Zeus SQF (using the option "Scenario" -> "Export" -> "Export to SQF", unless you use the "Export Mission SQF" module in Zeus to get your SQF.
For a Zeus to place this these in mission:
- They will either need to be set as the server admin or
- have access to the global channel or
- they will need to change sides temporarily to add the marker (this does not include remote controlling units!).
Edited by johnb43


