Prophet 101 with FK
Introduction
The Prophet team is a specialised unit within the platoon who, for the most part, will operate independently of the rest of the platoon to a certain degree. You will often find yourself alone on the battlefield, at a distance from any and all enemies and even friendlies and so supplies will be limited to whatever you can bring between the two of you.
The role of the Prophet team is two-fold:
- To scout out and relay enemy positions to the rest of the platoon
-
To provide accurate sniper overwatch
- A third role that you won't often have is to help guide in CAS (Close Air Support) and provide BDA's (Battle Damage Assessment i.e. Did the flyboys blow the correct shit up or did they fail horribly?) if you have LoS (Line of Sight) on targets that the FAC doesn't.
Accurate scouting and reporting is crucial to helping your platoon, be it any squads that end up moving into the area, or for FAC/CAS strikes as giving the wrong information could result in inaccurate strikes or squads entering the wrong compound for example.
The Prophet team consists of 2 people, the Sniper and the Spotter.
Prophet Sniper: You carry the big gun. You point said big gun at the target, zero in for the target using the numbers fed to you by your Spotter, pull the trigger and then feel ashamed when you miss.
Prophet Spotter: You carry an Assault Rifle and pretty much all the equipment necessary to get your Shooter on target. You direct your Shooter at targets of your choosing, do all the calculations, feed them the numbers and then laugh when they inevitably miss every shot. You'll also provide close security should you ever be engaged by enemy forces up close.
Things You'll Need:
Spotter
- A map
- Kestrel 4500
- ATragMX
- Vector 21/Vector 21 Nite
- Long range radio
- Extra ammo for your Shooter
Sniper
- Your sniper rifle
- Ammo
Things that will be helpful:
- Map Tools
- Maglite/Fulton
- Laser Designator and Batteries - at Platoon's discretion N.B. this does NOT replace the Vector. Bring this ALONGSIDE the Vector if you are told to bring it
- SSWT Kit
- Spotting Scope
- Range Card
- A pistol
The basics of ACE Zeroing
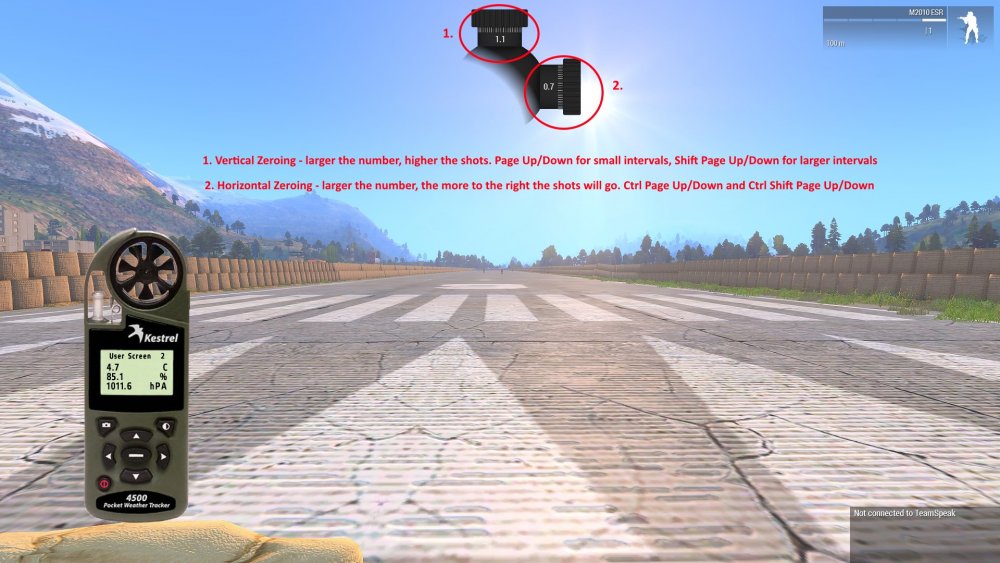
- Pressing Page Up/Down adjusts your vertical zeroing by 0.1 mils per tick. Shift Page Up/Down adjusts it by 1.0 mils per tick. The higher the number, the higher your shots will be/further the bullet will travel. For targets at longer ranges, you'll need a higher value than targets closer to you.
- Ctrl Page Up/Down adjusts your horizontal zeroing by 0.1 mils per tick. Ctrl Shift Page Up/Down adjusts it by 1.0 mils per tick. The higher the number, the more to the right your shots will be and vice versa.
Basic Vector 21 Usage
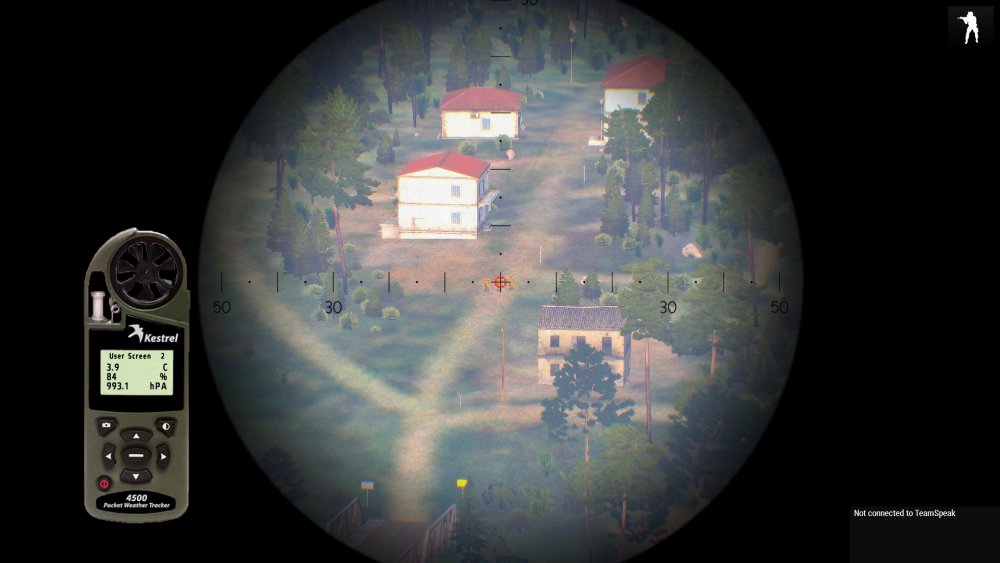
To get the distance to the target
-
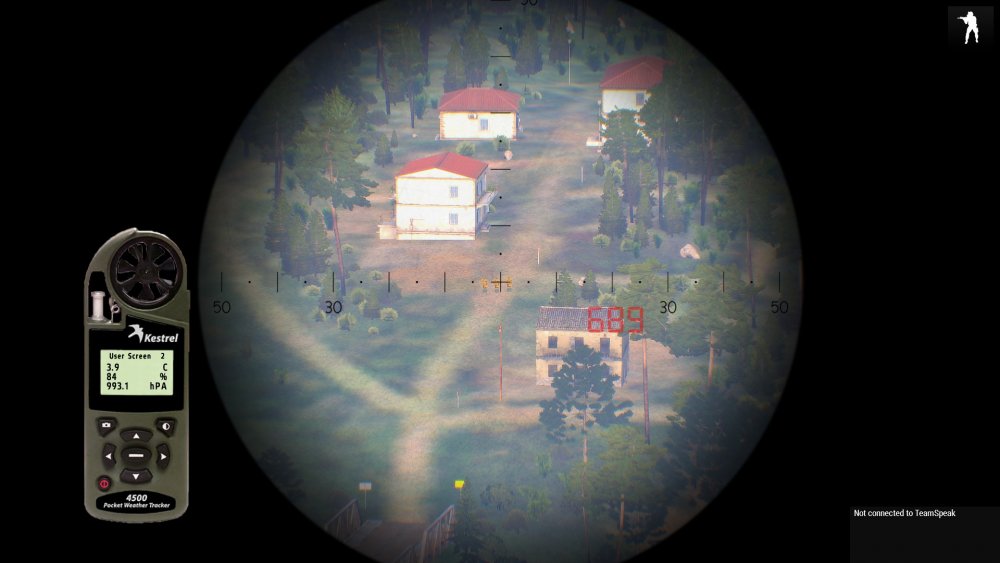
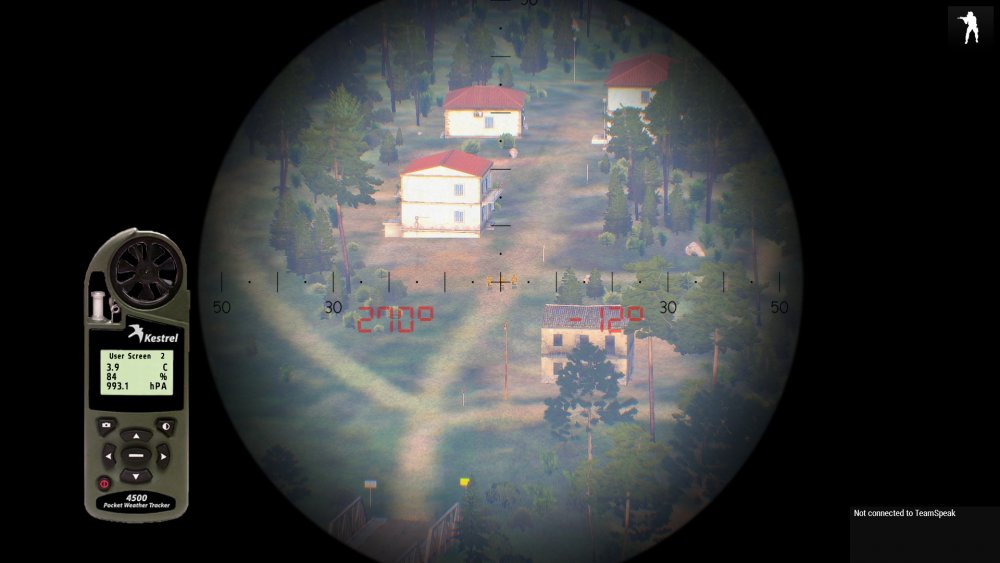
While looking through the Vector, aim the "+" at the target, hold down "R" until the red circle appears and then let go of "R"


This will give you the "slope distance", i.e. direct distance from you to the target -
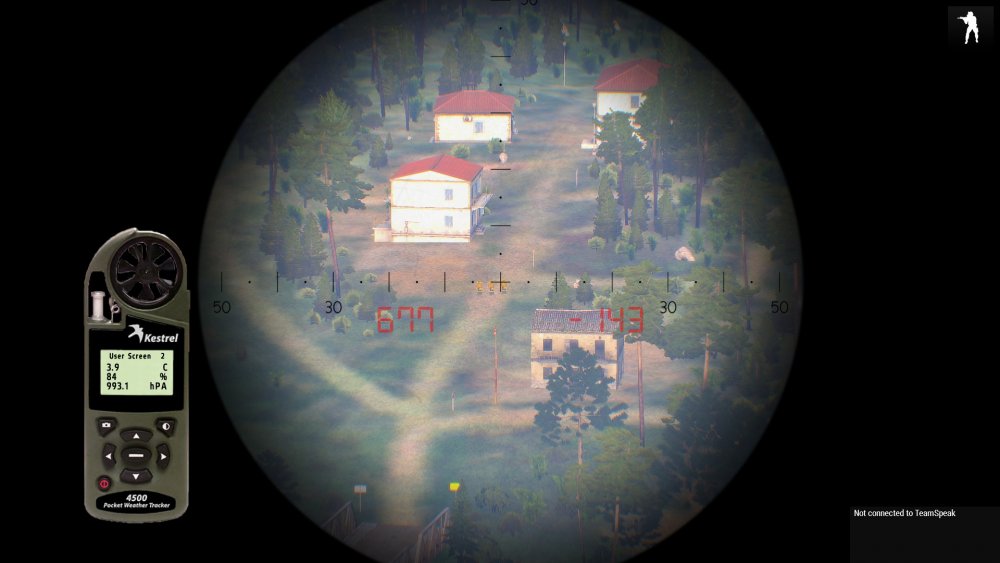
For the horizontal distance so you can accurately mark the target on the map, tap "R" then quickly press and hold "R" until the red circle appears, then release.

The horizontal distance will appear on the left side and the difference in elevation is on the right
To get the inclination angle (i.e. how high/low in degrees are you aiming)
-
Aim at the target, tap "Tab" and then quickly press and hold "Tab" until the numbers appear, after which you are free to release the key.

The azimuth (bearing) will appear on the left side and the inclination angle on the right
How to use the Range Card
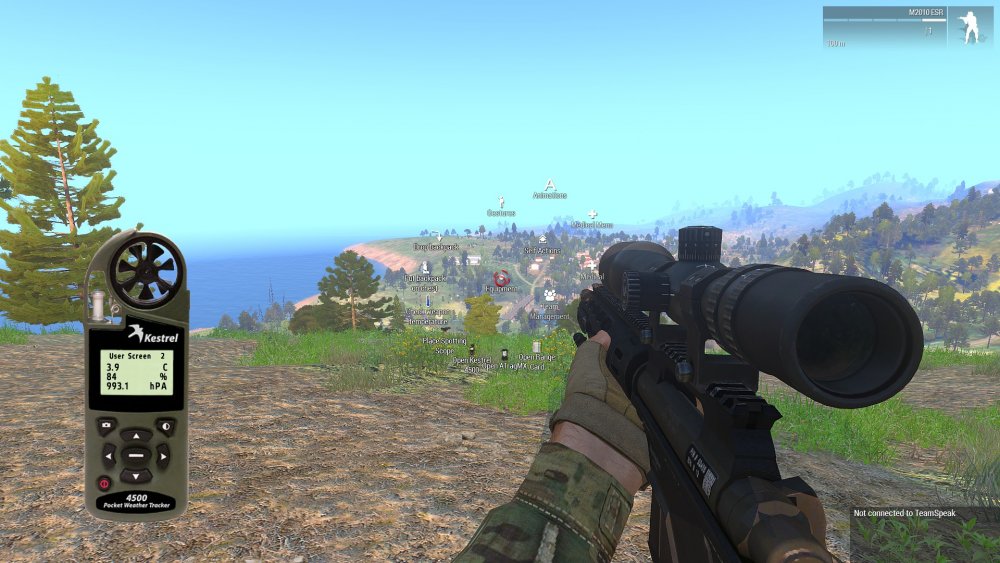
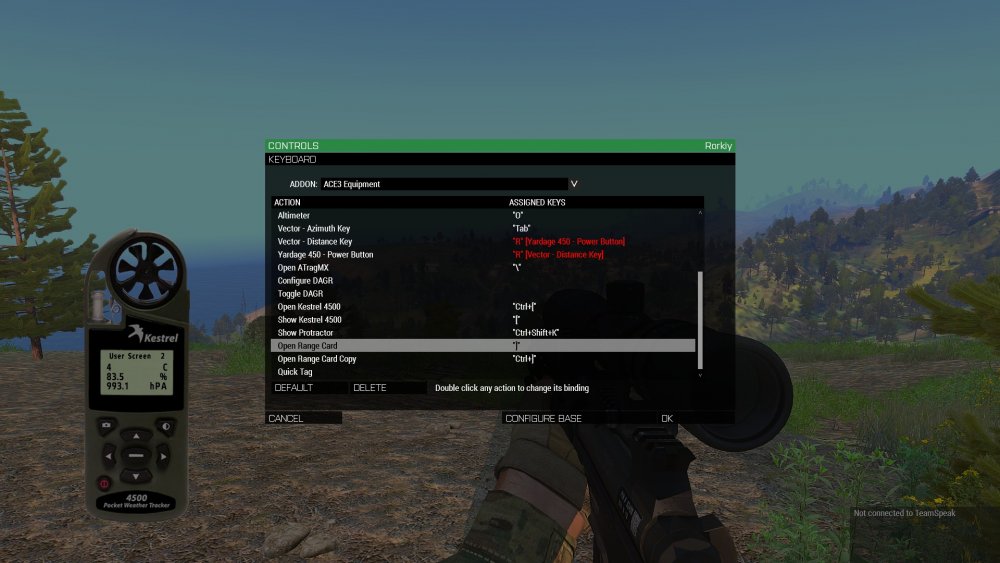
Opening the Range Card
Alternatively, give it a keybind.
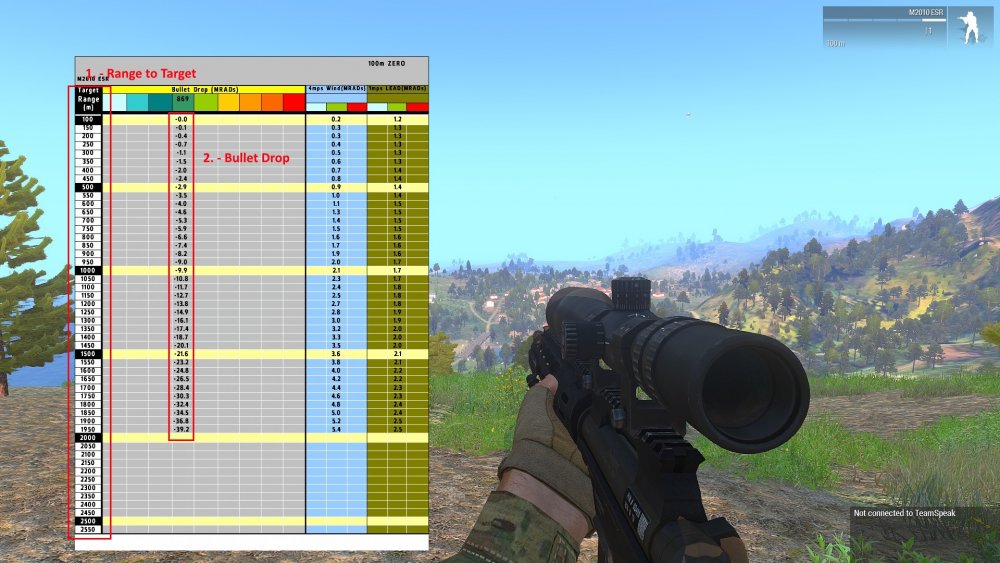
Reading the Range Card
- Using an already known range, follow the left hand column down until you reach the specified range
- Once you've reached the specified range/the closest one to it, move right along the row until you reach the value for the bullet drop
- Adjust accordingly, i.e. at 500m, bullet drop for the M2010 is at -2.9 mils, therefore you want your vertical zeroing to be at 2.9 mils.
N.B. This only applies if the target you are looking at is at roughly the same elevation as you
Operating the ATragMX
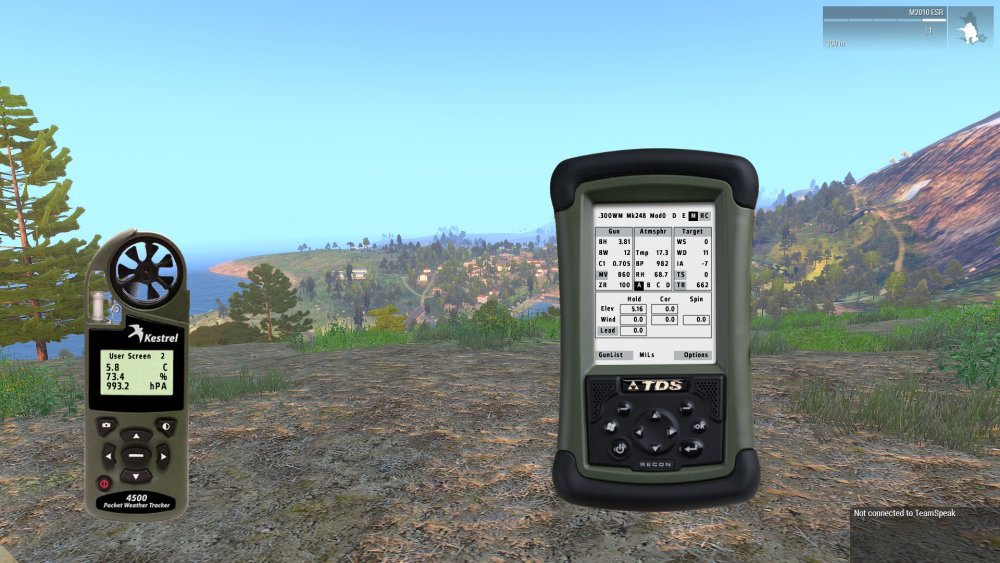
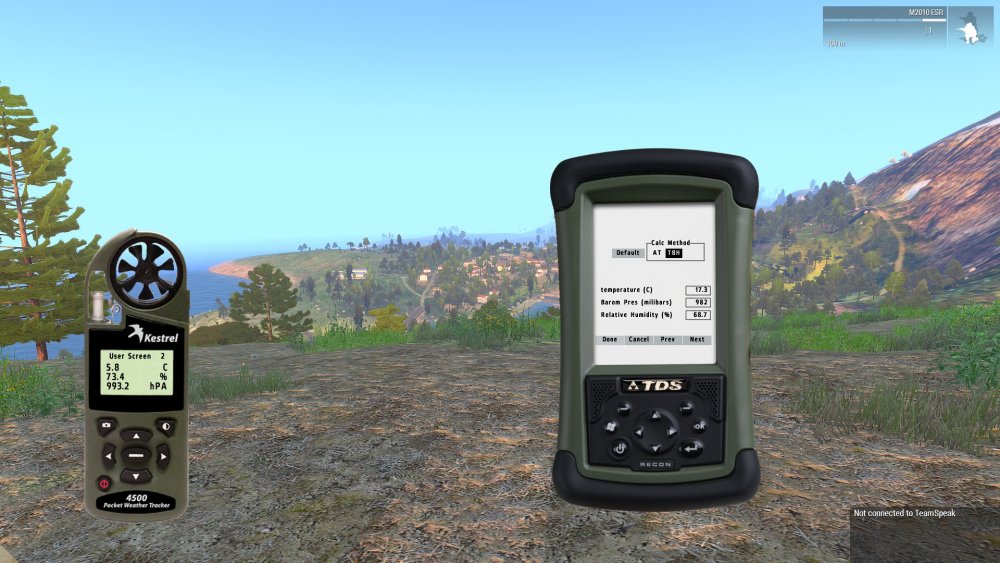
When you first open up the ATragMX, this is what it looks like. Confusing as all hell with numbers and stuff everywhere, isn't it? Gets quite easy once you get the hang of it though because for the most part, there are a lot of buttons that you don't actually need to press.
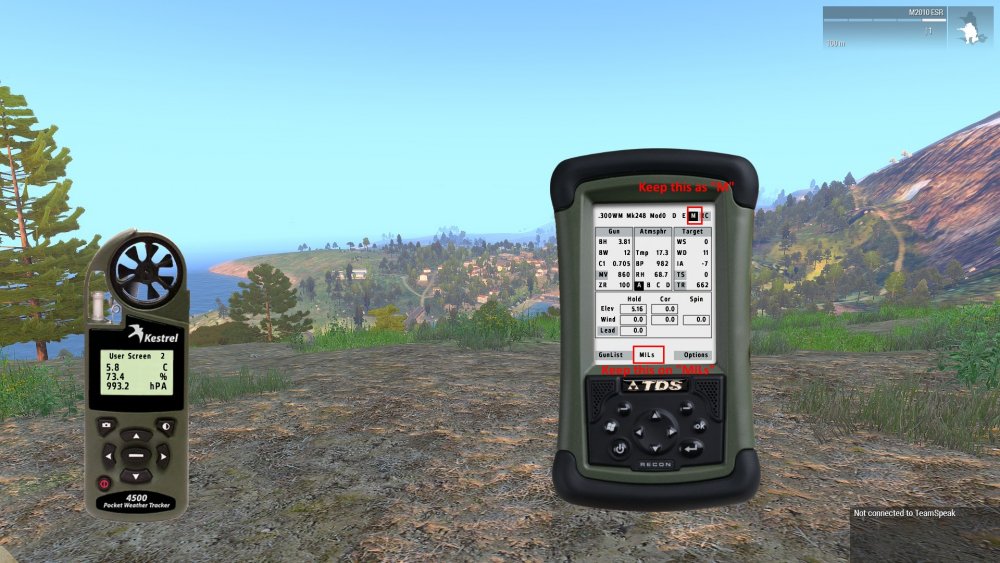
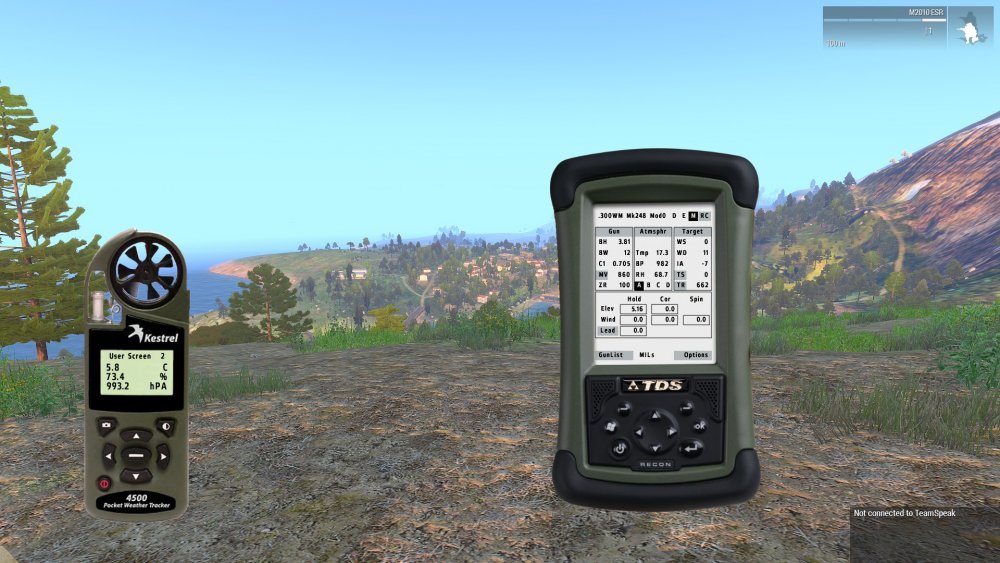
First off, you want to make sure that in the top right, the "M" is highlighted and that "MILs" is selected on the bottom. Click on them if they're not as shown until they are.
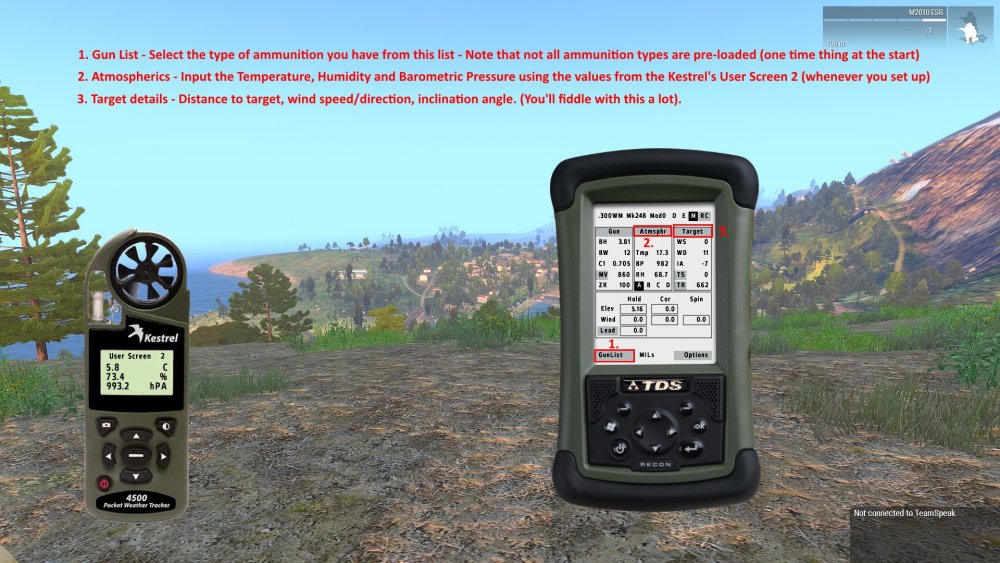
Once that's done, there are 3 main buttons that you will end up pressing.
-
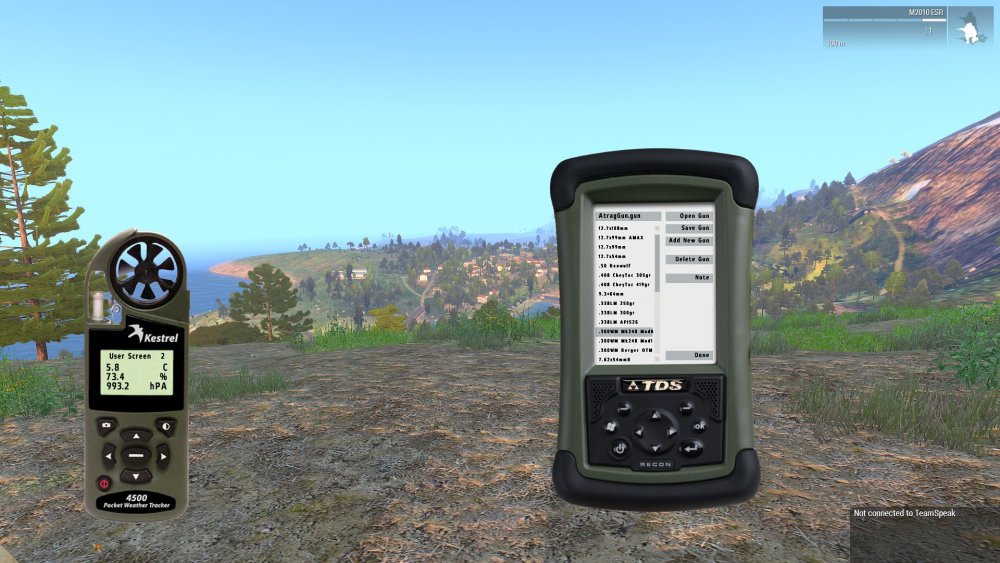
GunList - Here you select the type of ammunition that your rifle currently uses. There are a lot of preset ammunition types with the proper barrel ballistics etc already saved for you by the ACE and RHS team so you just look for the correct ammo from the list and select it. You should only need to do this once in the entire mission, or even in all your time as Prophet if you only ever use the same rifle and ammunition.

HOWEVER do take note that not all weapons that you can take are compatible with the ATragMX. There are some types of ammunition that do not work with it, such as the AWM's default Ball Ammunition.
-
Atmosphere - Here you input the different values for the atmosphere. You need to enter the Temperature, Humidity and Barometric Pressure using the values given to you in "User Screen 2" of the Kestrel 4500. You'll only really need to do this whenever you set up in a new location.

N.B. - The Kestrel displays the info in the order of Temperature, Humidity and then Pressure while the ATragMX has it in the order of Temperature, Pressure, Humidity
-
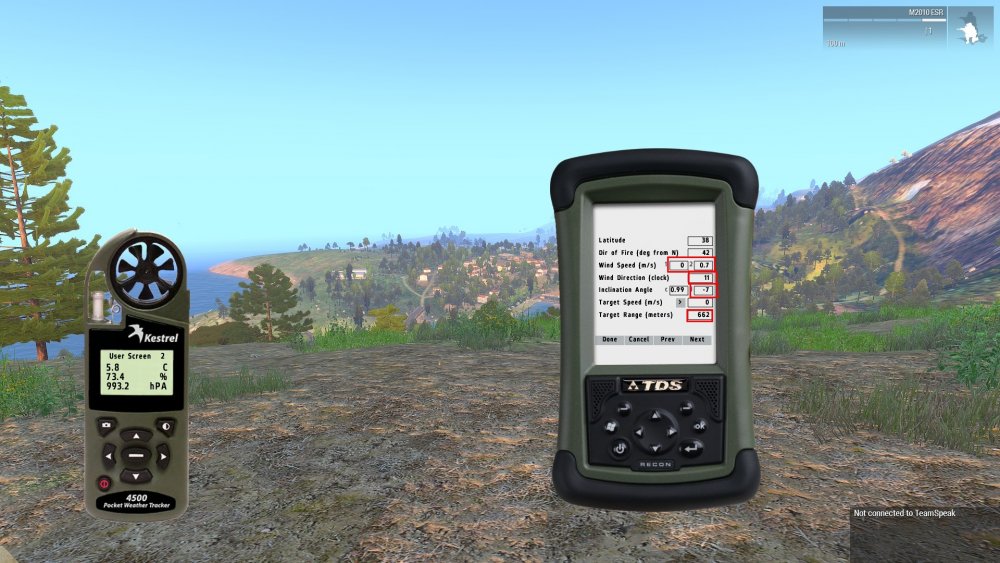
Target Details - The one part that you'll be fiddling around with the most. You'll pretty much have to go into this section for every new target.

The fields highlighted in red are pretty much the only ones you'll ever need to bother with.- Wind speed in m/s - You get this from the Kestrel, put it in the fields highlighted, the first box is for the lowest wind, 2nd is for the highest wind
- Wind Direction - This uses the "clock" system and you can find it by pressing "Shift+K" and you will have an Arrow show up in the top left corner of your screen. You want to input the direction the wind is COMING FROM. I.e. if the Arrow points straight Right to Left, so 3 o'clock to 9 o'clock, you put in 3
- Inclination Angle and Target Range - You get these using the Vector 21 and you can press Tab+R to have it auto-input inclination angle and target range data from the Vector into the ATrag.
When that's all done, (make sure you actually press "Done" on each screen), head back to the main screen and in the field for "Elevation" and "Hold" is the mils that you need to zero your scope at to get on target. If you are engaging targets that are really far away or the wind speed is not negligible, then clicking on the "Lead" button will change that field to Wind Speed, giving you the mils for the Left/Right adjustment to compensate for wind.
Additional Useful Info/Tips
-
The spotter and sniper should almost NEVER be any more than 10m away from each other AT MOST. If you're the spotter and you're not near your shooter, you can't spot for shit as any numbers that you feed them will be wrong. Even if the shooter tells you as the spotter "I know how to do this" you do not EVER leave each other's sides. Doing so is a quick and easy way to lose your tag for both roles.
-
The only reason you should be any distance from one another is if you've recently been engaged in close quarters combat in which case, the spotter should do a sweep of your surrounding area to make sure it is secure.
-
The only reason you should be any distance from one another is if you've recently been engaged in close quarters combat in which case, the spotter should do a sweep of your surrounding area to make sure it is secure.
-
Always keep scanning your immediate vicinity, especially as the Spotter. Some Zeuses like to spawn in enemy "patrols" or hunter killer teams who try to eliminate the Prophet team later on in missions. Sometimes you even have lone soldiers that the main force might have gone past without noticing who then come looking for you later on.
-
The spotter should NEVER be taking any Sniper Rifles, DMRs or high-magnification scopes. That's what your shooter is for. As a spotter, you stick to a regular Assault Rifle and the only shooting you really should be doing is when you're providing close security, be it clearing an area that you want to set up in, you've been engaged by enemy patrols, or if your shooter's completely out of ammo and you've been ordered to move in to help clear objectives.
-
Scout out the area first, choose your targets carefully. You only have limited ammunition so you want to make sure your shots count. Go for high priority targets such as static emplacement crew, AR/MGs, AT/AA soldiers etc. If you've used up a chunk of your ammo and you don't see any high priority targets anymore, don't be afraid to hold your fire, especially if you have objectives later on.
- Don't be afraid to get up close and personal if your shooter runs low/out of ammo. Sometimes a pistol is all you really need. Radio and I once cleared out 2 cargo tower compounds on our own using only pistols as we were out of ammo for our primaries as Prophet.
Edited by Rorkiy
-
 14
14


