


Military History - Battle of 73 Easting, Gulf War, 26-27th Feburary, 1991

BACKGROUND

In August of 1990, Saddam Hussein - the President of Iraq - launched an operation against the small neighbouring nation of Kuwait. Hussein's Iraqi Republican Guard overran the Kuwaiti positions within 2 days. Some of the Kuwait Armed Forces found sanctuary in Saudi Arabia and Bahrain. International response was against Iraq, with condemnations being raised and economic sanctions were raised against the nation. The United States, with the backing of the United Nations Security Council, sent US Forces to Saudi Arabia to protect the country from any Iraqi provocation. A coalition of nations was soon formed, featuring forces from several countries. The nations organised their forces into 4 Command Centres.
- Army Central Command - Saudi Arabia, United Kingdom, United States
- Marine Central Command - United States
- Joint Forces Command East - Egypt, Saudi Arabia, Syria, Morocco, Kuwait, Oman, United Arab Emirates, Qatar, Bahrain, Poland, Czechoslovakia
- Joint Forces Command North - United States, United Kingdom, France, Canada, Italy, Australia, Japan, Turkey
As coalition forces arrived, they began Operation Desert Shield. This operation would continue for nearly 7 months while Iraq occupied Kuwait.
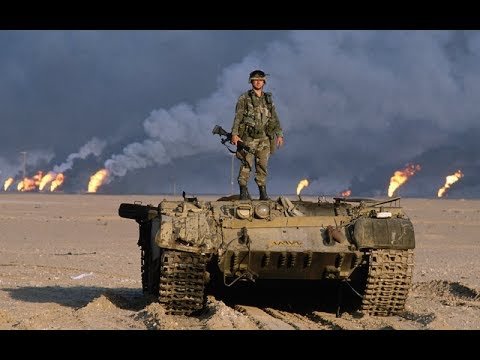
On the 17th Janurary, 1991, the coalition launched Operation Desert Storm - a prolonged aerial and naval bombardment of Iraqi held Kuwait and southern Iraqi territories, followed by a ground assault. The bombardment lasted for 5 weeks, with over 100,000 sorties dropping 88,500 tons of munitions on military targets.
Iraq's response was to launch SCUD missiles at Coalition forces, and also at Israel.
Coalition forces responded on the 15th February by crossing the Saudi Arabian border with Task Force 1-41 Infantry, a US Heavy Battalion from the 2nd Armoured Division (Forward) - the spearhead of VII Corps.
To mark the progress of the Coalition advance, several Phase Lines were drawn along north-south UTM lines. 73 Easting was one of these Phase Lines. It was a large, featureless desert.
ORDER OF BATTLE
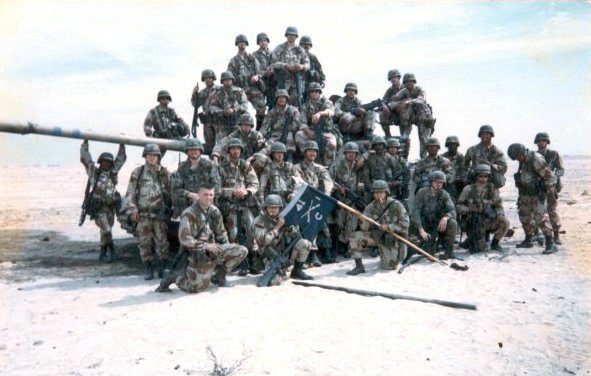
The main US unit leading the battle of 73 Easting was the 2nd Armoured Cavalry Regiment (2ACR).
2ACR was comprised as follows
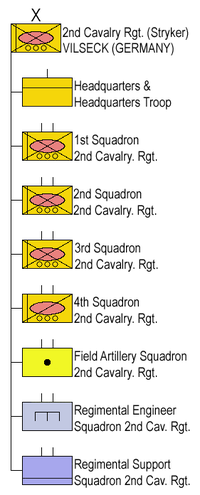
1st, 2nd and 3rd Squadrons consisted of 3 Cavalry Troops, a Tank Company, an Artillery Battery and a Headquarters Troop.
Each Troop consisted of 120 soldiers, 12 M3 Bradley IFVs (13 in the HQ Troop) and 9 M1A1 Abrams.
This means that each Squadron consisted of 360 soldiers, 36 M3 Bradleys and 27 M1 Abrams.
4th Squadron was an attack helicopter squadron.
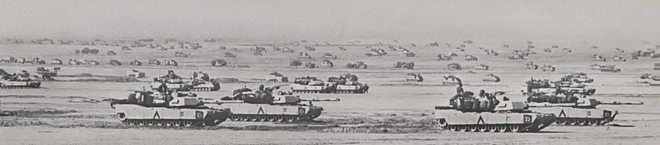
In total, the 2ACR deployed to Desert Storm with 1080 Soldiers, 108 Bradleys and 81 Abrams in the 1st, 2nd and 3rd Squadrons alone.
Troops were organised in Alphabetical call-signs along the entire Regiment.
Due to the nature of post Hussein rule in Iraq, a lot of military documents went missing or were doctored. As such, there is no clear indication of how many Iraqi troops were present during the battle, but elements of the following units were confirmed to be involved in the primary battle.
- 18th Mechanised Brigade (c. 2500-3000 troops)
- 37th Armoured Brigade, Tawakalna Division (c. 2500-3000 troops)
THE PLAN

2ACRs plan was to cross the Saudi Arabian border as VII Corps leading unit. They were to cut off the Iraqi route of retreat and to locate and destroy 5 Republican Guard divisions which were a threat to the Arab/USMC units assaulting from the South.
FIRST CONTACT

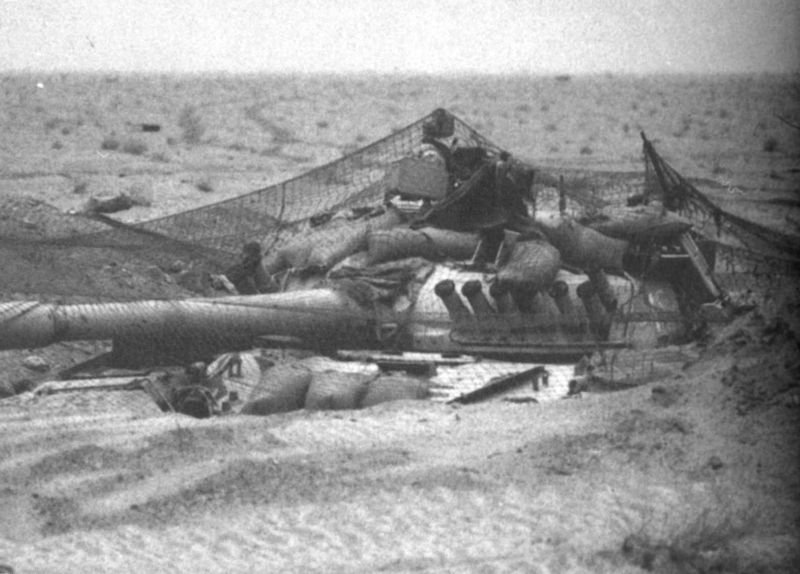
On the morning of the 26th, 2ACRs forward scouts located the Tawakalna Division, lined North to South facing the ACRs route of advance. All Iraqi units were observed to have well constructed defensive positions, complete with alternative positions already dug. The 2ACR called in aerial and artillery bombardments on the Iraqi positions, but despite extensive shelling, the Iraqi defences remained effective. After this bombardment, 2ACR pushed forward and engaged the Iraqi units. by 9AM, all 3 Squadrons were in contact. Their air cover was forced to retire however, due to a violent sandstorm. The ground fighting continued, and despite poor visibility the 2ACR continued their advance. After 3 hours of fighting, 2ACR reported the destruction of 12 T-55 tanks, 25 APCs, 6 Artillery pieces and an unknown number of trucks. The Iraqi troops withdrew to the East.
73 EASTING

73 Easting generally refers to an armoured combat action while 2ACR was covering the North of VII Corps area of operations. The 2ACR was faced by the Tawakalna Division's 18th and 9th Brigades, who had squared up against Troops E (Eagle), G (Ghost) and I (Iron); with troop K (Killer) support I.
As the 2ACR continued their screening advance North as they encountered fresh Iraqi positions along the IPSA Pipeline Road - the Iraqi MSR. The Troops skirmished with Iraqi units until 3:45 pm, when E Troop (callsign EAGLE) manouvered around the 70th Easting. Iraqi Tanks opened fire on E Troop who returned fire at range. Long range engagements continued on in this fashion. I Troop raced in from the South to reinforce E troop, while G Troop attempted a flanking manoeuvre on the Iraqi defences. They got caught in another defensive position to the East at 4:45, and were stuck in an ongoing engagement with Iraqi troop for the rest of the day.
At 4:10pm, Eagle Troop was engaged by Iraqi infantry who were holding a cluster of buildings. The Iraqi troops were acting as a delaying force so another armoured unit could engage E Troop. Within 23 minutes, E Troop's 9 M1A1s destroyed 28 Iraqi Tanks and 16 APCs with no losses on the American side. Following this, E Troop crested a hill and emerged in the middle of an Iraqi Tank Company that was setting up defensive positions on the reverse side of the hill. The sudden appearance of the American vehicles surprised the Iraqi tank crews, and swift action destroyed several vehicles and forced the remainder to flee.
3km to the East, 2ACR spotted T-72s in prepared defensive positions. They continued their advance onto these T-72s. They manoeuvred up onto high ground to engage the tanks - 18 T-72s were destroyed.
With visibility diminishing, and still no contact with G Troop, 2 Bradleys were sent out as a scouting force to locate the missing friendlies.
The scouts encountered another force of 13 T-72s, and despite being without armoured support, the engaged the Tanks. Despite 1 misfire and reloading the launchers under fire, the 2 Bradleys killed 5 tanks before help arrived in the form of I Troop ("Iron"), K Troop ("Killer") and G Troop ("Ghost").
The assault continued, with I troop taking the lead. Leading with their Abrams, 16 enemy tanks were destroyed. Occupying the now abandoned Iraqi defensive positions, I troop spotted another formation of enemy tanks moving towards them. The Bradleys were brought forward and engaged the hostile tanks with TOW missiles.
During the firefight, a misfire from K Troop made a TOW missile hit one of I Troop's Bradleys. The 3 Crewmen within were wounded - fortunately the infantry had already dismounted.
THE DEADLOCK
By 4:40, 2ACR was setting itself up in fresh defensive positions along ridgelines watching from the North to the South. G Troop was positioned as the Northernmost Unit, they kept eyes on a wadi - a broken water feature with bulrushes and other line of sight breaking terrain. A few Iraqi tanks engaged G Troop from defensive positions but where swiftly dealt with. Suddenly, additional Iraqi tanks from the Tawakalna and 12th Divisions began pushing against G Troop's position in a concentrated counter-attack. Supporting fire was given by retreating Iraqi units who were using the wadi as a means of retreat.
By 6:30, several waves of T-72s and T-55s were attacking the Troop, providing overwatching fire as infantry charged their positions. The situation forced 2ACR's commander to call in massed mortar, artillery and helicopter attacks to prevent G Troop from being overrun. The fighting was so intense that the Military Intelligence Platoon from the HQ Troop was forced to suspend their signal interception and man defensive positions.
The engagement lasted for 6 hours, with G troop constantly firing it's own mortars and the Troop Support Team calling in 720 howitzer and MLRS rounds. By 9pm, G Troop was running short on ammunition - severe shortages of 25mm and 120mm ammo, and half of their TOW missiles having been expended. H Troop dispatched it's Abrams Tank Company to intervene. By this point G Troop had destroyed "at least two companies of Iraqi armour and hundreds of infantrymen".
One of G Troop's M3 Bradleys was lost. The TOW launcher was inoperative, and the 25mm chaingun jammed as a BMP-1 - thought to be disabled - fired it's main gun directly into the Bradley's turret. Sergent Nels A. Moller, the gunner, was killed.
Artillery fire was directed to the 78th Easting, planned to prevent Iraqi retreats and further forces from assaulting G Troop. An after action report from the Regimental Fire Support Officer reported that 1,382 rounds of 155mm howitzer ammunition and 147 MLRS rockets were fired at positions on the 78th Easting. Estimated kills were placed at 17 Tanks, 7 APCs, 6 Artillery pieces, 70 soft-skinned vehicles and an unknown number of infantry.

After 10pm, major engagements ceased. Co-ordinated artillery fire and the skilled training of G Troop ensured their survival. Iraqi Units continued to sporadically engage G Troop positions until the arrival of the 1st Infantry Division to bolster 2ACR's position. With the arrival of 1ID, the 2ACR became a Corps Reserve. 1ID continued onwards and secured 73 Easting. The commendations for the victory over the Battle for 73 Easting was given almost entirely to 2ACR.
AFTERMATH
The 2nd and 3rd Squadrons of the 2nd Armoured Cavalry Regiment had destroyed 2 brigades of the Iraqi Republican Guard. 2 Squadron alone confirmed 55 destroyed tanks, 45 AFVs and 865 prisoners; while the rest of the Regiment captured 2000 prisoners, destroyed 159 tanks and 260 other vehicles.
The battle of 73 Easting opened the way for the remainder of VII Corps to advance to the Battle of Norfolk - a massed armoured engagement which marked the end of combat operations in the North of Kuwait. It was a vital engagement, and the only large engagement of the war in which American Troops found themselves outnumbered and outgunned.

PUTTING IT INTO PRACTICE :
When zeusing the battle of 73 Easting, there's a few tips I can give for playing the American side. Firstly, use Diyala as your map, with your players starting in the South-Eastern corner. The bridges, Airfield and towns between them make for good objectives with a mix of open country and closed areas for your infantry to fight in.

Asset wise, really let your players go wild. 3 M1A1SA Abrams Tanks and put your squads in M2A3 Bradleys. With 3 members of the Squad serving as the crew, you still have enough space to transport the remaining infantry.

When setting up the enemy, use Takistani Armed Forces. T-55s and T-72s are good to face the players with, following up with Mechanised Infantry in BMP-1s. I'd set some T-55s up in defensive positions near the bridges to give them a little longevity and added protection against the powerful Abrams guns.

For further reading, The Strategy Bridge did a report on Eagle Troop's actions during the battle, it's worth a read. Hope you enjoyed this month's article!
-
 4
4
-
 1
1
-
 9
9


Recommended Comments
Join the conversation
You can post now and register later. If you have an account, sign in now to post with your account.
Note: Your post will require moderator approval before it will be visible.